Before/After: Build A Stock-Tank Cold Plunge For A Tiny Yard
A bare corner of a small yard becomes a working cold plunge in six moves – stock tank, insulated lid, chiller, pump, wireless thermometer and a step.
Published October 12, 2026 · 6 picks
A stock tank is one of the most common ways people build a cold plunge at home. It is a farm water trough, it costs a fraction of a made-for-purpose plunge, and the 100-gallon size fits places a plunge tub would not – a strip beside the fence, the end of a patio, the corner by the side gate. That is the yard this guide is for: small, overlooked from the kitchen window, with room for one tank and not much else.
It is also where a lot of stock-tank plunges quietly stop. The tank works on the first weekend, with ice from the gas station. By the third weekend it is a trough of tepid water with leaves in it. This guide starts from that “before” and ends with the same corner holding a tank that is cold, clean and ready on a weekday morning – six pieces of hardware, each one the reason one part of the picture changed.
Before: a trough, a bag of ice and a corner nobody uses
Stand at the back door in the “before”. The corner by the fence holds a few pavers and the recycling bins. A plunge here means a dozen bags of ice from the store, a tank that has to be filled and emptied every time, and water that is cold for an hour and then whatever the weather says. When the tank is left full, the wind fills it with leaves, the sun warms it, and nobody can tell from the house whether it is fit to get into. Climbing in over a knee-high wall with cold, wet feet on the way out is awkward enough that the plunge gets put off.
None of that is the tank’s fault. What is missing is a lid, a way to keep the water cold, water that moves, a number you can read from inside and a safe way in and out. Here is what changes, in the order it is built.
Step 1 · Give the corner a tank
Before: a patch of uneven ground and nothing that holds water.
The Rubbermaid Brute 100-gallon stock tank is the usual starting point for a reason: 53 × 31 × 25 in (135 × 79 × 64 cm) fits a narrow strip, it is deep enough for most adults to sit in up to the chest, and the insulated covers in Step 2 are cut for its oval. It is structural foam plastic with stiffeners in the walls and a 2 in drain plug in a protected recess. It is sold for livestock water, not people, and says nothing about plunges – which is fine, as long as you treat the ground under it with respect.
- Full, it holds roughly 830 lb (375 kg) of water on an area about the size of a doormat and a half. Set it on level, firm ground – compacted gravel or level pavers – not on a soft lawn and not on a deck nobody has checked for the load.
- Put the drain-plug end toward the lowest corner, a bed or a lawn, away from the house and the path.
- Leave about 2 ft (60 cm) at one end for the chiller in Step 3 and room on one long side for the step in Step 6.
- Fill to a few inches below the rim. You will add your own volume when you get in.
After: the corner has a tank that sits level and holds water, with a plan for where every other piece goes.
Step 2 · Close the lid on leaves and lost cold
Before: leaves and bugs on the water by evening, and a sun that warms it all afternoon.
An open stock tank in a yard collects everything the yard drops, and it gives back cold the moment the sun touches it. The Polar Protector hard insulated cover is a rigid EPS foam lid in a black fabric shell, cut to 32 × 52.5 in (81 × 133 cm) for the 100-gallon oval, with six hooks and tightening buckles and a skirt that closes the gap at the rim. In the photos it folds in half, so one person takes it off and puts it back.
The listing gives no thickness and no insulation value, so this guide promises no number; covered water simply loses cold more slowly than open water, and the chiller in Step 3 runs less for it.
- Measure the rim before you order. The maker asks for it, and it fits one tank shape.
- Bring the chiller hoses over the rim at the chiller end, under the fold, so the only gap is in one place.
- Buckle it every time, not just on windy days. A lid that blows off in the night is a lid that is not there.
- It is not a safety cover and does not claim to be. Where children or pets can reach the yard, see the safety note at the end.
After: the water is clear and dark under a closed black lid, and the cold stays where you put it.
Step 3 · Retire the ice bags
Before: ice from the store for every plunge, and water that is only cold the hour after.
The Active Aqua 0.5 HP chiller is rated for 90 to 172 gal (341–651 L), so a 100-gallon tank sits inside its range rather than at the edge – the smaller 0.25 HP model stops at 92. It is rated at 4,020 BTU and 510 W, has a titanium evaporator, a digital set point and a Boost mode for faster cooling, and ships with 1/2, 3/4 and 1 in fittings. It has no pump and no hoses, and its listing gives no lowest temperature and no cool-down time.
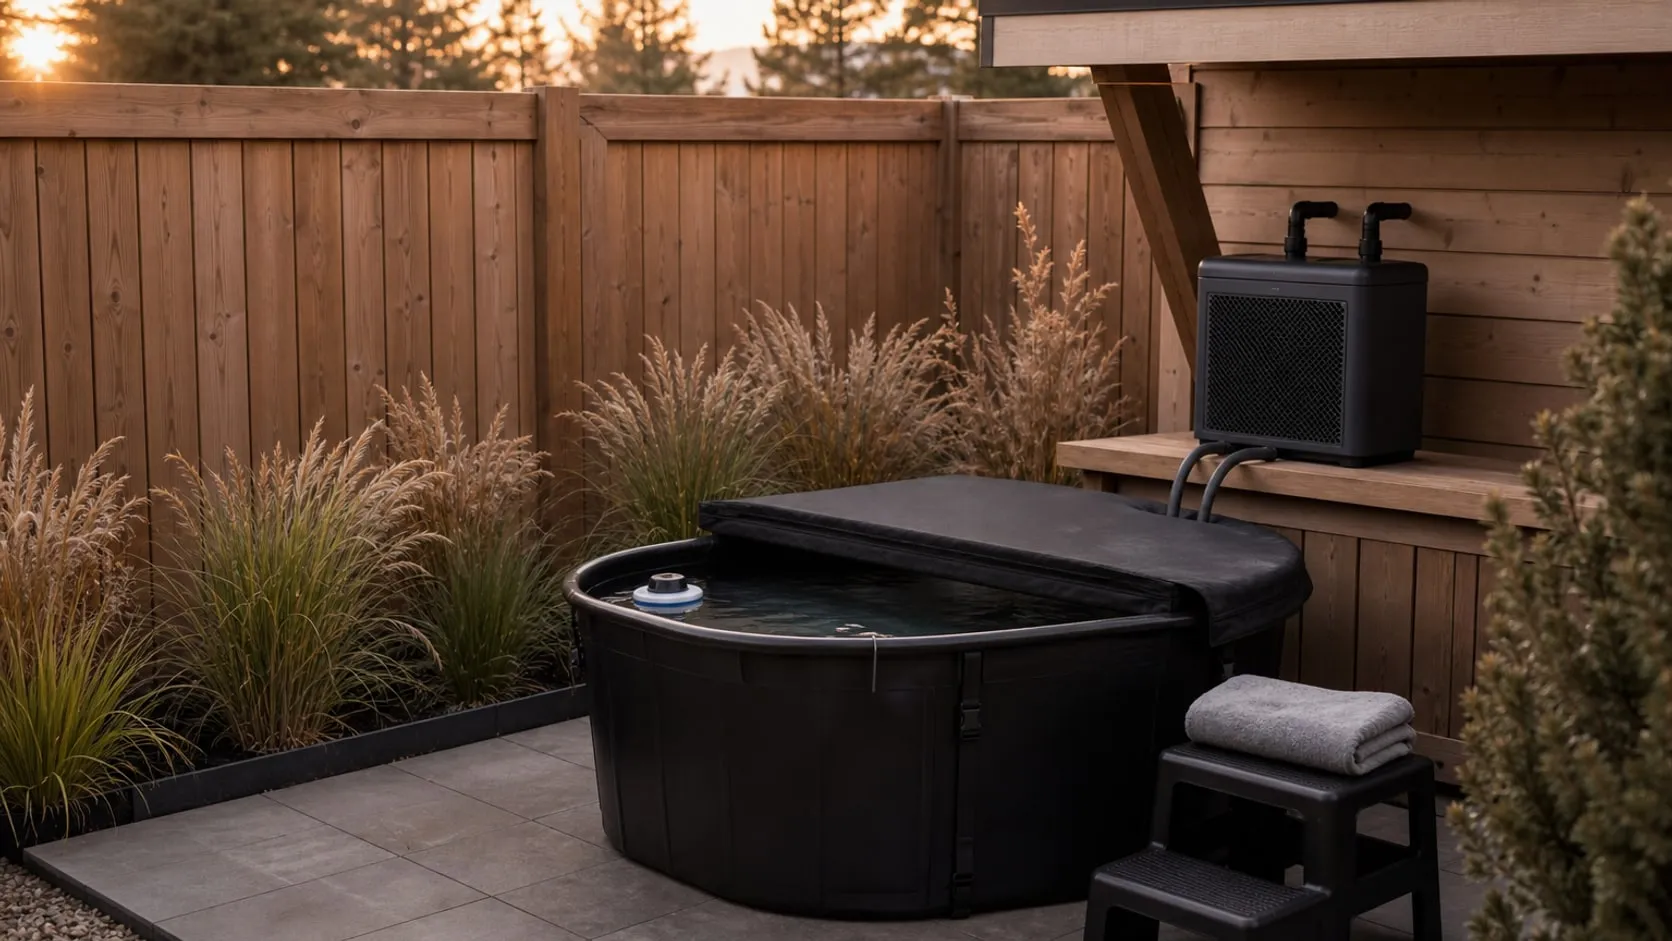
In a tiny yard the hard part is where it stands. Nothing on the listing says it may sit in the rain, so it needs a roof edge, a ventilated shelter or a shelf under the eaves – off the ground, out of splash range, with free air around the grille, because it pushes the heat it takes out of the water into the air beside it.
- Pick one temperature and leave it. A common range for home plunges is 50 to 59 °F (10–15 °C); start at the warm end.
- Plan the first plunge for the morning after the first fill. A chiller cools a full tank over hours, not minutes.
- Keep the lid buckled while it runs.
- Give it its own outlet. At 510 W it should not share an extension cord with anything.
After: the water is the same temperature on Thursday as it was on Sunday, and nobody has carried a bag of ice.
Safety: water and electricity in one corner of a yard need a ground-fault circuit interrupter (GFCI) – an outdoor outlet with TEST and RESET buttons and a weatherproof cover, fitted by an electrician if the yard has none. No extension cords across wet ground. Neither the chiller’s nor the pump’s listing says they may run with someone in the water, so unplug both before you get in.
Step 4 · Make the water move
Before: a chiller beside a tank, with nothing to carry the water between them.
The Active Aqua 800 GPH pump sits on the tank floor on suction-cup feet and pushes up to 800 GPH (3,028 L/h) through a barbed outlet to the chiller; the water comes back down a second hose, cold. A dial on the front turns the flow down. It is the largest of the pumps the smaller Active Aqua chiller’s listing names; the 0.5 HP listing names none, so confirm the pairing in that chiller’s manual before you plumb it.
- Buy hoses to fit the chiller’s fittings and keep both runs as short as the layout allows.
- Put the pump at the far end of the tank from where the cold water comes back, so the loop stirs the whole tank.
- Run the hoses over the rim under the lid’s fold (Step 2), and clamp them so they cannot slip out and drain the tank onto the patio.
- Rinse its intake guard at every water change. It protects the pump; it does not filter the tank.
After: the whole tank is one temperature, top to bottom, and the water moves gently whenever the lid is on.
Step 5 · Read the tank from the kitchen
Before: a walk across the yard in socks to put a hand in the water and guess.
The TempPro TempAir Solar is a white float with a small solar panel that sends the water temperature to a receiver with big backlit digits on the kitchen counter. The listing gives ±0.9 °F (±0.5 °C) between 32 and 140 °F, a sensor range down to -40 °F, an IPX8 float and an update every 5 seconds. The float charges itself from the sun; the receiver runs on two included AAA cells. The 500 ft range is the maker’s figure – the real one depends on the wall between the tank and the counter.
- Tie the float at the opposite end from the chiller’s return, so it reads the tank and not the stream.
- Set the receiver where you see it in the morning – beside the kettle, not in a drawer.
- It has no timer. Decide the time before you get in and hang a clock where you can see it from the tank. Thirty seconds to two minutes is a full first plunge.
- Lift it out before a water change.
After: you know from the kitchen whether the tank is ready, and the plunge starts before the excuses do.
Step 6 · Turn the climb into two steps
Before: a knee-high wall to swing a leg over, and a wet, shaky climb out.
The Rubbermaid 2-step stool is black molded plastic with two textured, slip-resistant treads, the top one at about 16 in (41 cm), non-slip feet and a listed load of 300 lb (136 kg). Against the long side of a 25 in tank, it turns getting in into a step down and getting out into two steps down. It weighs 5.6 lb (2.5 kg), so it moves aside for a water change, and there is nothing on it to rust.
It has no handrail; the tank rim is what you hold. It is also listed for indoor rooms and the garage, not for a patio, so when it is not in use it can live under the eaves with the chiller.
- Set it square on level ground, never on the slope of the drain end.
- Lay a towel over the top tread before you get in, so the first wet foot lands on something dry.
- Get in sitting on the rim, feet first, then lower yourself. Out the same way, slowly.
After: in and out are two steady steps, and the climb is no longer the reason to skip it.
After: the same corner, a different morning
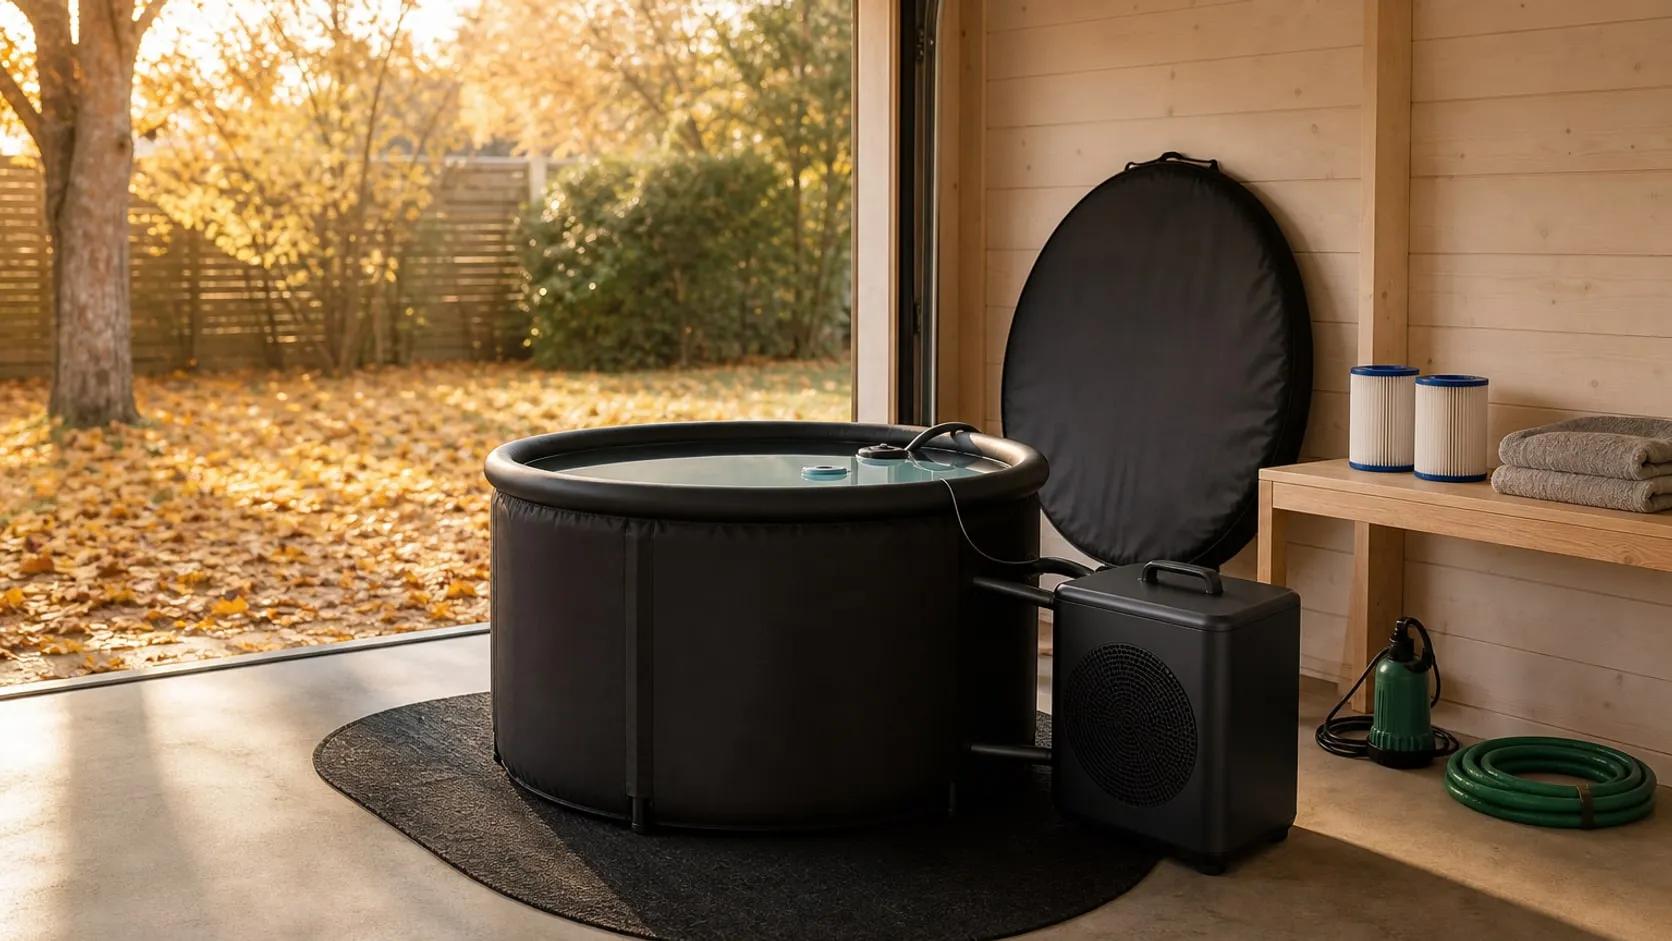
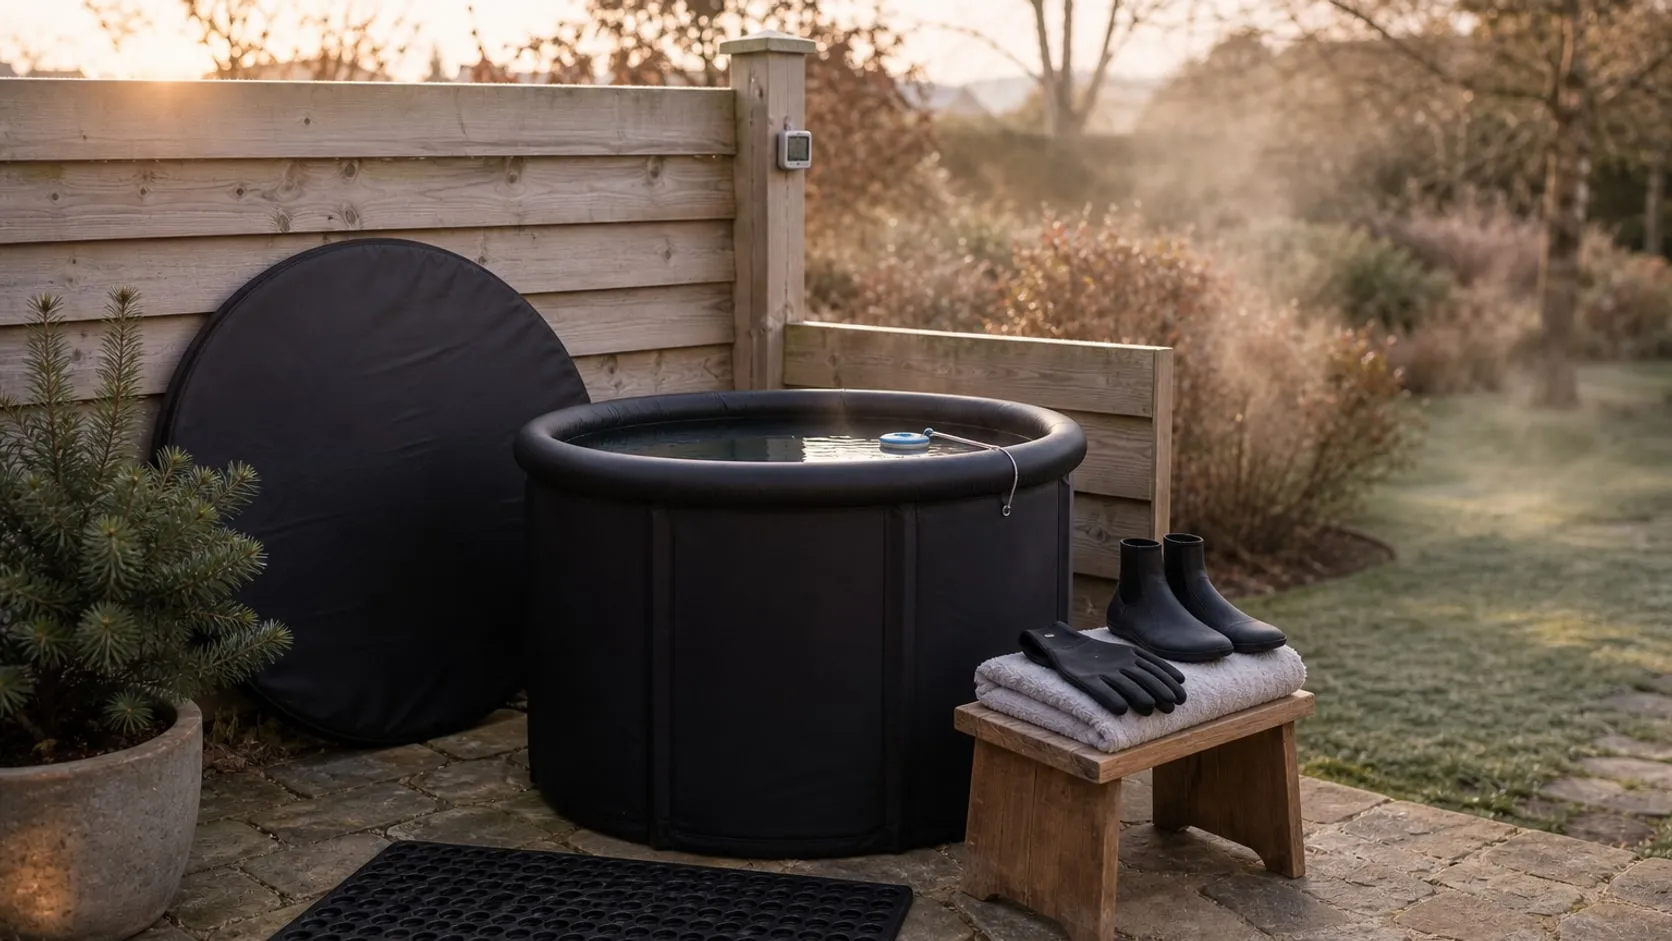
Look out of the kitchen window in the “after”. The receiver on the counter says 54 °F. In the corner by the fence, on level pavers, the black oval tank sits under a closed, buckled black lid; at one end two hoses run under the fold to a gunmetal box on a shelf under the eaves, and a black stool stands against the long side with a towel folded on top. The water under the lid is clear and still, and it has been 54 °F all week.
There is no decision left to make. You walk out, unplug the chiller and the pump, unbuckle and fold the lid back, sit on the rim and get in slowly – head above water, breathing settling over the first half minute, out when the clock says. Two steps down, towel, lid on, buckles closed, plugs back in. The whole thing takes less time than the ice run used to.
Safety: cold water makes you gasp and breathe fast for the first seconds – that is normal, and it is why you get in slowly and never alone. Get out at once if you feel dizzy, numb or unwell, and do not plunge after drinking alcohol. If you are pregnant, have a heart condition or high blood pressure, or take medication that affects either, talk to your doctor before you start. Children should not use the tank, and a foam lid is not a safety barrier: where children or pets can reach the yard, lock the gate or drain the tank.
Keeping the “after”
- Lid on and buckled after every plunge.
- This build has no filter, so the water is kept clean by routine: rinse off before you get in, keep the lid on and change the water on a schedule – sooner if it clouds, smells or the walls feel slick. Whether to add a sanitizer, and which, is a question for the chiller’s manual first, since the water runs through it.
- At a water change, unplug everything, lift the pump and the float out, and open the 2 in drain toward the bed.
- Press the GFCI’s TEST button once a month. If it will not trip, or trips on its own, unplug everything and find out why before you reset it.
- Before a hard freeze, check the chiller’s manual. A chiller is not a heater; if the manual does not cover freezing weather, drain the tank and bring the chiller and pump inside.
At a glance
6 picks- 01 Amazon
Step 1 · Give the corner a tank
Rubbermaid Commercial Products Brute Stock Tank, 100-Gallon - 02 Amazon
Step 2 · Close the lid on leaves and lost cold
Polar Protector 100 Gallon Oval Stock Tank HARD Insulated Cover - 03 Amazon
Step 3 · Retire the ice bags
Active Aqua Water Chiller with Boost, 0.5 HP, 90-172 Gal, Cold Plunge - 04 Amazon
Step 4 · Make the water move
Active Aqua Submersible Water Pump, 800 GPH, Magnetic Drive, Hydroponic - 05 Amazon
Step 5 · Read the tank from the kitchen
TempPro TempAir Solar Pool Thermometer Floating with Waterproof Sensor - 06 Amazon
Step 6 · Turn the climb into two steps
Rubbermaid 2-Step Molded Plastic Step Stool, Lightweight with Slip Resistant Treads and Non-Slip Feet, Black
As an Amazon Associate I earn from qualifying purchases. If you buy through a link on this page we may earn a small commission – the price is the same for you. How this works.
01
Rubbermaid Commercial Products Brute Stock Tank, 100-Gallon
A 53-inch oval farm tank fits beside a fence on a level pad and holds enough water to sit in up to the chest.
Most backyard stock-tank plunges start with this tub or one like it. The Brute 100-gallon is a black oval farm tank, 53 in long, 31 in wide and 25 in deep (135 × 79 × 64 cm), made of Rubbermaid’s structural foam plastic with a ribbed base, stiffeners molded into the walls and a 2 in drain plug in a protected recess at one end. The listing gives a 10-year limited warranty and says it is made in the USA.
It is sold for cattle and horses, not people, and the listing never mentions plunges. What makes it the usual choice anyway is the size: it fits a patio corner, it is deep enough to sit in up to the chest for most adults, and the insulated stock-tank covers on Amazon are cut for its oval. Set it on a level, firm pad before the first fill – once it holds water it is not moving.
Tip: Put the drain-plug end toward the lowest corner of the yard or the nearest bed, so a water change runs away from the house and the path.
02
Polar Protector 100 Gallon Oval Stock Tank HARD Insulated Cover
A foam lid cut for the 100-gallon oval keeps out the yard and keeps in the cold the chiller made.
A stock tank with no lid gives back the cold a chiller worked for and collects every leaf in the yard. This Polar Protector is a rigid lid made for the 100-gallon oval tank: an EPS foam core in a black fabric shell, 32 × 52.5 in (81 × 133 cm), held on by six hooks with tightening buckles and finished with a skirt that closes the gap at the rim. In the photos it folds in half down the middle, which makes it a one-person job to take off and put back.
The listing gives no thickness and no insulation value, so how much difference it makes is not a number anyone can promise; covered water simply loses its cold more slowly than open water. It is not a safety cover and does not claim to be. Measure the rim before you order – the maker asks for that in capital letters.
Tip: Run the chiller hoses over the rim at one end, under the fold, so the gap they leave is in one place and the buckles still close.
03
Active Aqua Water Chiller with Boost, 0.5 HP, 90-172 Gal, Cold Plunge
A half-horsepower chiller rated for 90 to 172 gallons holds the tank at one temperature without a trip to the store.
The smaller Active Aqua chiller stops at 92 gallons; this one starts at 90 and runs to 172, which puts a full 100-gallon stock tank comfortably inside its range rather than at the edge of it. It is the same hydroponics design – a gunmetal box with a mesh front, a titanium evaporator and a digital panel with a Boost button – rated at 4,020 BTU and 510 W, and its listing now names cold plunges and ice baths as a use.
It is a bare chiller. Water is pushed through it by a separate pump, the box holds fittings but no hoses, and the listing gives no lowest temperature, no cool-down time and no pump range for this model. Nothing on the listing says it may stand in the rain either, so in a yard it belongs under a roof edge or a ventilated shelter, off the ground, with free air around the grille.
Tip: Check the 0.5 HP manual for the pump flow it wants before you buy the pump – the listing does not give it.
04
Active Aqua Submersible Water Pump, 800 GPH, Magnetic Drive, Hydroponic
An 800 GPH pump on the tank floor sends water through the chiller and back, so the whole tank cools evenly.
A chiller that sits beside the tank needs something to send water to it. The AAPW800 is a gray-and-black box pump, about 9 in (22 cm) long, that sits on the floor of the tank on suction-cup feet and pushes up to 800 GPH (3,028 L/h) through a barbed outlet on top. A dial on the front turns the flow down, and the drive is magnetic with a ceramic shaft.
It is the biggest of the three pumps the smaller Active Aqua chiller’s listing names; the 0.5 HP chiller’s listing names none, so the manual is where to confirm the pairing. The listing says nothing about use with someone in the water. Treat it as equipment that runs between plunges and is unplugged before you get in.
Tip: Set the pump at the far end of the tank from where the chilled water comes back, so the loop stirs the whole tank instead of chilling one corner.
05
TempPro TempAir Solar Pool Thermometer Floating with Waterproof Sensor
A solar float sends the water temperature to a backlit display indoors, so you know it is ready before you open the door.
On a small yard the tank is often thirty steps from the back door, and a thermometer you have to walk out to read is a reason to stay in. The TempAir Solar is a white float with a blue band, a small solar panel and a little LCD on top; it sends the reading to an indoor receiver with big backlit digits that stands on a counter. The listing gives ±0.9 °F (±0.5 °C) between 32 and 140 °F, a sensor range of -40 to 158 °F, 5-second updates and an IPX8 rating.
The sensor charges itself from the sun into a built-in battery, and the receiver runs on two included AAA cells. The 500 ft range is the maker’s figure; the real one depends on the walls in between. It does not keep time, so the clock for the plunge is still a separate thing.
Tip: Tie the float at the opposite end from the chiller’s return hose, so the receiver shows the tank and not the stream of freshly chilled water.
06
Rubbermaid 2-Step Molded Plastic Step Stool, Lightweight with Slip Resistant Treads and Non-Slip Feet, Black
A two-tread plastic stool against the long side makes getting in slow and getting out steady.
A 25 in tank wall is about knee height, which is easy to step over dry and a different thing when you are cold, wet and shivering slightly. The Rubbermaid RM-P2 is a black molded-plastic stool with two textured treads, the top one at about 16 in (41 cm), non-slip feet and cut-out handles in the sides. The listing gives a 300 lb load and a weight of 5.6 lb (2.5 kg).
It has no handrail, so the tank rim does that job, and it is listed for indoor rooms and the garage rather than a patio – plastic in full sun all summer is a fair question for the manual. Set it square against the long side of the tank on level ground and it turns the climb out into two steps down.
Tip: Put a towel over the top tread before you get in, so the first foot out lands on something dry.