How To Set Up A Basement Cold Plunge Without Breaking The Bank
A safety-first basement cold plunge in seven steps – a folding tub, a retrofit chiller and pump, protected power, a leak alarm, a wireless thermometer and a step.
Published October 6, 2026 · 7 picks
A basement is a good place for a cold plunge. The floor is concrete, the air stays cool all year, nothing falls into the water and nobody has to cross a frozen yard in January. It is also the room where a spill has nowhere to go and where power and water end up closest together.
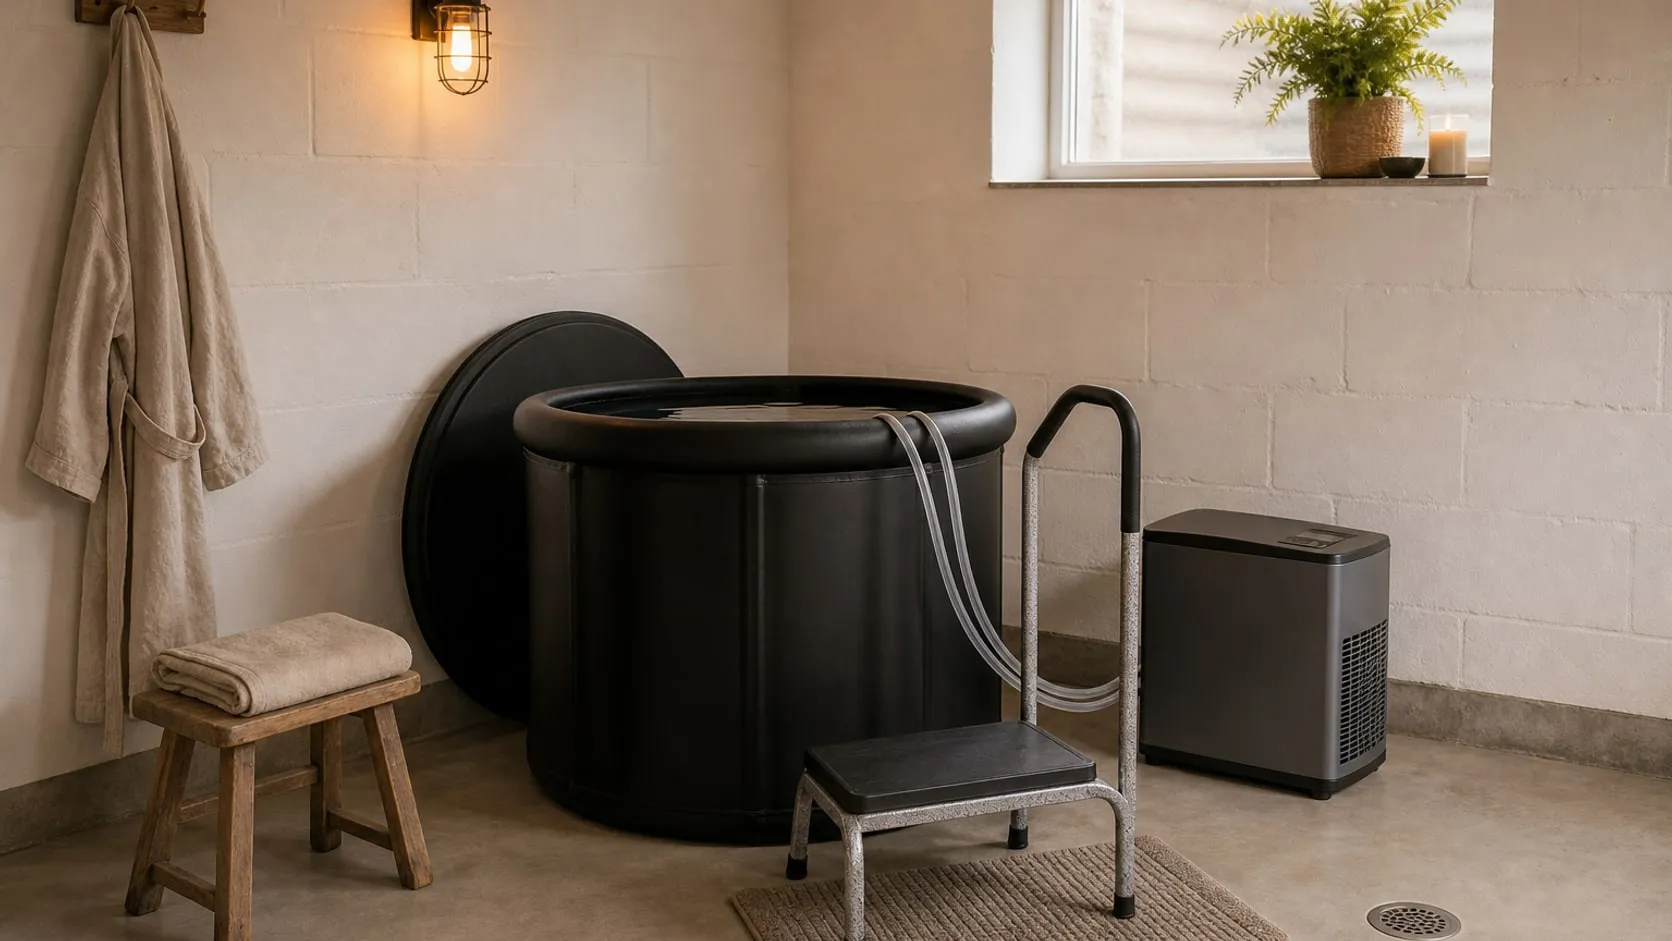
The build below is the simple one that home plungers keep trading notes on: a soft-sided folding tub, a small retrofit chiller and a pump to connect them. No plumbing, no carpentry, and every part can be replaced on its own. The seven steps run in a safety-first order – floor and water first, then power and alarms, then you.
Many people use a cold plunge after training or to start the day. It is also a real shock to the body, so the safety notes belong to the setup as much as the parts do.
Step 1 · Pick the spot and set up the tub
Start with the floor, not the tub. The right corner has four things: bare, level concrete; a floor drain, sump or utility sink within hose reach; a grounded outlet about 6 ft (1.8 m) away; and a clear path to the stairs.
The VEVOR Ice Bath Tub in its 90 gal size is an upright barrel 31.5 in (80 cm) across and 29.5 in (75 cm) high. It stands on support tubes with an inflatable ring around the top, folds into a carry bag and comes with a lid; the listing describes a foam layer in both the wall and the lid. Its listed capacity sits just inside what the chiller in Step 2 is rated for, which is the reason to pick this size and not a bigger one.
- Sweep the concrete before you unfold the tub. The box includes repair patches for punctures, and grit under a full tub is how punctures start.
- Keep it off carpet and away from anything that minds getting wet – stored boxes, the furnace, the electrical panel.
- Point the side drain pipe toward the floor drain, or plan to pump the water out (Step 3).
- Fill it with a hose from a utility sink or laundry faucet, to about two-thirds. Your body takes up the rest.
A full tub holds about 750 lb (341 kg) of water, and at two-thirds it is still about 500 lb (227 kg). A concrete slab on the ground carries that without trouble. A raised or wooden floor is a question for someone qualified before you fill anything.
Step 2 · Add the chiller
Ice works in a backyard. In a basement it means carrying blocks down the stairs for every plunge, and it cools the water only once. A chiller holds a set temperature for as long as it runs.
The Active Aqua 0.25 HP chiller comes from hydroponics, where it cools nutrient reservoirs, but its listing names cold plunge baths as a use and rates it for 40 to 92 gal (151–348 L). It has a titanium evaporator, a digital temperature control and a Boost function. It has no pump and no hoses – those are Step 3.
- Stand it on a dry, level spot beside the tub where splashes do not reach, with free air around its grilles. It is 19 in (48 cm) tall and weighs 48.2 lb (21.9 kg).
- A chiller moves heat out of the water and into the room. In an open basement that goes unnoticed; in a small closed room, leave the door open while it runs.
- Expect the first cool-down after a fresh fill to take hours, not minutes. The listing gives neither a cool-down time nor a lowest temperature, so read the manual before you plan around a number.
- Keep the lid on while it runs. Covered water stays cold longer and puts less moisture into the basement air.
Step 3 · Connect the pump
The chiller is designed for a flow of 396 to 925 gallons per hour, per its listing, which also names the pumps that match it. The Active Aqua AAPW550 is the middle one: 550 GPH (2,082 L/h), 33 W, a 6 ft (1.8 m) cord. This tub has no hose ports, so the loop goes over the rim, the way it does on a hydroponic reservoir:
- Pump on the floor of the tub, held by its suction-cup feet. One hose from the pump up over the rim to the chiller’s inlet, a second from the chiller’s outlet back over the rim into the water.
- Buy flexible tubing to match the chiller’s hose fittings, plus hose clamps. Neither listing gives the fitting size, so check the manual before you order. Keep both runs short – every extra foot costs flow.
- Start the pump alone first and look for steady flow and dry joints. Only then switch on the chiller. Do not run the chiller without water moving through it, or the pump dry.
- The lid will rest on the two hoses and leave a small gap. That is the trade-off of a tub without ports.
- The foam filter on the pump’s intake keeps hair and grit out of the pump. Rinse it when the flow drops.
The same pump empties the tub. With a listed maximum lift of 5 ft (1.5 m), it can push the water up into a utility sink when a floor drain is out of reach.
Safety: this pump is made for reservoirs, aquariums and ponds, and its listing says nothing about running in water with a person in it. Treat the chiller loop as something that runs between plunges, never during one. Before you get in, unplug it at the wall (Step 4), and leave it unplugged until you are out and dry.
Step 4 · Protect the power
This is the step that makes the rest acceptable. Everything electrical near the tub belongs on a ground-fault circuit interrupter (GFCI), a device that cuts the power when it senses current leaking to ground.
Newer basements often have one already – look for TEST and RESET buttons on the outlet, or a GFCI breaker in the panel. Many older basements do not. Where the outlet is unprotected, the proper fix is a GFCI outlet or breaker fitted by an electrician. A plug-in unit such as the Tower Manufacturing inline GFCI adds protection at the plug, and it earns its place in this setup for a second reason: its three outlets put the chiller and the pump on one plug, so there is exactly one thing to pull before you get in.
- Plug the GFCI cord into the wall, and the chiller and the pump into its triple tap. The cord is rated for 15 A in total. The pump draws 33 W; the chiller’s listing gives no power draw, so check its rating plate.
- Hang the GFCI module and the tap clear of the floor. Let each cord dip below its plug before it rises to it, so drips run off at the low point.
- No extension cords and no power strips on the floor.
- Press TEST before the first use and about once a month. The power should cut out, and RESET should bring it back. If it does not, stop using the cord.
- Before every plunge: dry hands, then pull the one plug at the wall.
Safety: a GFCI lowers the risk of a serious shock. It does not make it safe to share the water with a live pump – both rules apply, every time. If the GFCI trips more than once, unplug everything and find the cause before you reset it again.
Step 5 · Set a leak alarm
Outdoors, a slow leak waters the lawn. In a basement it spreads under shelves and along walls until somebody notices. Two hose joints, a drain tap and a soft-sided tub are all places where a drip can start.
The Basement Watchdog water alarm is a palm-sized battery box that sounds at 110 dB when it touches water. The listing says it senses as little as 1/32 in (0.8 mm), on any of its sides.
- Pour a cup of water on the floor once and watch where it runs. Put the alarm at that low spot, near the chiller’s hose connections and the tub’s drain tap.
- Keep it out of the splash zone by the step, or every exit will set it off.
- Test it on a damp cloth when you set it up and at every water change. It runs on one 9 V battery.
- It only makes noise – nobody gets a phone alert. Before a trip, look over the joints and consider draining the tub.
Step 6 · Watch the temperature
The chiller shows its own set point, but the number that matters is the water in the tub – and with a basement it helps to know it before you walk down. The TempPro TempAir is a floating sensor with a separate backlit display that receives the reading by radio. The maker states an accuracy of ±0.9 °F (±0.5 °C) between 32 and 140 °F (0–60 °C), rates the sensor IPX8 and names cold plunges among its uses.
- Float the sensor away from the return hose, so it reads the tub and not the freshly chilled stream. Tie its string to something fixed to keep it clear of the pump’s intake.
- Keep the display where your day starts – kitchen, bedroom, home gym. The 500 ft (152 m) range is the maker’s figure and a floor in between shortens it, so check that the display still updates from the spot you chose.
- The display remembers the highest and lowest reading of the last 24 hours. If the high creeps up from day to day, the chiller is not keeping up: check the lid, the flow and the pump’s foam filter.
- A common range for home plunges is about 50 to 59 °F (10–15 °C). Colder is not better, least of all in your first season.
- It has no timer. Hang a clock where you can see it from the tub and decide on the time before you get in. Thirty seconds to two minutes is a full first plunge.
Step 7 · Step in and out safely
The wall of this tub is 29.5 in (75 cm) high, the floor is concrete and your legs will be cold on the way out. The inflatable ring gives way if you lean on it. The Drive Medical step stool puts a ribbed rubber platform of about 14 × 10 in (36 × 25 cm) beside the tub and a steel handrail 34 in (86 cm) high next to it, with a listed capacity of 500 lb (227 kg).
- Set it snug against the tub with all four rubber feet flat on the concrete, and check that it does not rock.
- The step is no more than 10 in (25 cm) high, so the rim is still a real step-over. Hold the rail, lift one leg in and lower yourself – no jumping, in or out.
- Put a rubber-backed bath mat at the foot of the step, and a towel and dry clothes within reach of the rail.
- Wipe up puddles after each plunge. Wet, smooth concrete is slippery.
- Leave a light on over the tub and on the stairs.
A plunge, start to finish
- Check – the display upstairs shows the water in your range.
- Tell someone – better still, have them in the room. Nobody hears a call for help from a basement.
- Unplug – dry hands, one plug at the wall. The loop is off.
- Get in – lid off, hand on the rail, in slowly. Keep your head above water and wait for your breathing to settle.
- Get out – when the clock says so, or sooner.
- Warm up – dry off, dress, and sit for a few minutes before you take the stairs on cold legs.
- Restart – lid on, dry hands, plug back in. Water should flow from the return hose within seconds; if it does not, unplug again and check the pump.
Safety: cold water makes you gasp and breathe fast for the first seconds. Never plunge alone or after drinking alcohol, and get out right away if you feel dizzy, numb or unwell. If you are pregnant, have a heart condition or high blood pressure, or take medication that affects either, talk to your doctor before you try it. Children should not use the tub. A fabric lid is not a safety barrier, so keep the basement door closed or locked where children or pets are in the house.
Keep it fresh and dry
Neither the tub nor the chiller has a water filter. Rinse off before you get in, keep the lid on and change the water regularly, or follow the tub maker’s water-care instructions – and read both manuals before you add any sanitizer. At each water change, rinse the pump’s foam filter, look over the hose clamps and the drain tap, and press the GFCI’s TEST button. Stay with the pump while it empties the tub and unplug it before it runs dry.
Cold surfaces collect condensation in humid months. Wipe down the tub wall, the hoses and the floor, and if the basement is damp, run a dehumidifier plugged in well away from the tub. Seven parts, one plug, no plumbing – and if the basement is ever needed for something else, the whole setup drains, folds into a bag and stands in a corner.
At a glance
7 picks- 01 Amazon
Step 1 · Pick the spot and set up the tub
VEVOR Ice Bath Tub, 90 Gal Inflatable Folding Bathtub with Cover - 02 Amazon
Step 2 · Add the chiller
Active Aqua Hydroponic Water Chiller, 0.25 HP, Pure Titanium, 40-92 Gallon - 03 Amazon
Step 3 · Connect the pump
Active Aqua AAPW550 Submersible Water Pump, 550 GPH, 33W, 6 Ft Cord - 04 Amazon
Step 4 · Protect the power
Tower Manufacturing 30438024 Auto-Reset 15 AMP Inline GFCI Triple Tap Cord, 2 Feet, Yellow - 05 Amazon
Step 5 · Set a leak alarm
The Basement Watchdog Compact 110 dB Water Alarm w/360° Sensing Technology (BW-WA360) - 06 Amazon
Step 6 · Watch the temperature
TempPro TempAir Wireless Pool Thermometer Floating Easy Read with Batteries - 07 Amazon
Step 7 · Step in safely
Drive Medical Bariatric Heavy-Duty Step Stool with Handrail, Silver Vein
As an Amazon Associate I earn from qualifying purchases. If you buy through a link on this page we may earn a small commission – the price is the same for you. How this works.
01
VEVOR Ice Bath Tub, 90 Gal Inflatable Folding Bathtub with Cover
An upright 90-gallon folding tub with an insulated lid fits a basement corner and matches what a small chiller can handle.
A basement tub has two jobs: hold the cold and stay out of the way. This VEVOR is an upright barrel 31.5 in (80 cm) across and 29.5 in (75 cm) high with a listed capacity of 90 gal (341 L). It stands on support tubes with an inflatable ring around the top, and the listing describes a foam layer in both the wall and the lid. When the floor is needed for something else, it drains through a side pipe or a bottom plug and folds into its carry bag.
What the listing does not describe is a pair of ports for a chiller, so a chiller’s hoses go over the rim and the lid sits on top of them. There is no filter either. Mind the weight when you choose the spot: a full tub is about 750 lb (341 kg) of water before anyone gets in.
Tip: Sweep the floor before you unfold it and fill it only about two-thirds – your body takes up the rest, and grit under a full tub is how punctures start.
02
Active Aqua Hydroponic Water Chiller, 0.25 HP, Pure Titanium, 40-92 Gallon
A quarter-horsepower chiller rated for 40 to 92 gallons holds the water at a set temperature, with no ice to carry downstairs.
This chiller comes from hydroponics, where it keeps nutrient reservoirs cool, but its listing names cold plunge baths as a use and rates it for 40 to 92 gal (151–348 L). That makes it a fit for a small upright tub rather than a long, lie-down one. It has a titanium evaporator, a digital temperature control and a Boost function for faster cooling.
It is a bare chiller: water has to be pushed through it by a separate pump of 396 to 925 GPH, and neither pump nor hoses are in the box. The listing also leaves out the lowest temperature it reaches and how long a cool-down takes, so those are questions for the manual. At 19 in (48 cm) tall and 48.2 lb (21.9 kg), it stands on the floor beside the tub.
Tip: Size the tub to the chiller, not the other way round – a tub whose listed capacity sits inside the 40 to 92 gal rating keeps the chiller within what it was built for.
03
Active Aqua AAPW550 Submersible Water Pump, 550 GPH, 33W, 6 Ft Cord
A 550 GPH pump named on the chiller's own listing moves tub water through the chiller and back.
A chiller without a pump is a cold box that nothing flows through. The AAPW550 is the middle of the three pumps the Active Aqua chiller’s listing names: 550 GPH (2,082 L/h) from 33 W, with a magnetic drive, a ceramic shaft and a foam filter over the intake. It sits on the floor of the tub on suction-cup feet and pushes water up a hose to the chiller.
It is a hydroponics and aquarium pump, and the listing says nothing about running in water with a person in it. Treat it as equipment that works between plunges: unplugged before you get in, plugged back in when you are out and dry. Its listed maximum lift of 5 ft (1.5 m) is also enough to empty the tub into a utility sink.
Tip: Keep both hoses as short as the layout allows – every extra foot of tubing costs flow, and the chiller wants at least 396 GPH.
04
Tower Manufacturing 30438024 Auto-Reset 15 AMP Inline GFCI Triple Tap Cord, 2 Feet, Yellow
A plug-in GFCI with three outlets puts chiller and pump on one protected plug – the one you pull before getting in.
Anything electrical near a tub of water belongs on a ground-fault circuit interrupter, a device that cuts the power when it senses current leaking to ground. Newer basements usually have one in the outlet or the panel; many older ones do not. This cord adds one at the plug: a three-prong plug, an inline GFCI module with TEST and RESET buttons, and a triple tap with three grounded outlets on 2 ft (61 cm) of 12/3 cord rated for 15 A.
For a chiller build the triple tap matters as much as the protection. Chiller and pump share one plug, so there is one thing to pull before you get in the water. It is a portable device, and the listing gives no ingress rating – keep the module and the tap off the floor.
Tip: Press TEST before the first use and about once a month – the power should cut out and RESET should bring it back. If it does not, stop using the cord.
05
The Basement Watchdog Compact 110 dB Water Alarm w/360° Sensing Technology (BW-WA360)
A palm-sized 110 dB alarm on the floor by the hose joints speaks up before a drip turns into a wet basement.
Outdoors, a slow leak waters the lawn. In a basement it spreads under shelves and along walls until somebody notices. This alarm is a small battery-powered box, 2⅜ × 1 × 3¼ in (6 × 2.5 × 8.3 cm), that sounds at 110 dB when it touches water. The listing says it senses as little as 1/32 in (0.8 mm) and detects water on any of its sides.
It is deliberately simple: one 9 V battery, no app, no wiring. That also means it only helps when someone is in the house to hear it. Before a trip, look over the hose joints and consider draining the tub.
Tip: Pour a cup of water on the floor near the tub once and watch where it runs – that low spot, close to the hose joints, is where the alarm belongs.
06
TempPro TempAir Wireless Pool Thermometer Floating Easy Read with Batteries
A floating sensor sends the water temperature to a display upstairs, so you know the tub is ready before you go down.
A chiller shows its own set point, but the number that matters is the water in the tub. This thermometer splits the job in two: a floating sensor that stays in the water and a separate backlit display that receives the reading by radio. The maker states an accuracy of ±0.9 °F (±0.5 °C) between 32 and 140 °F (0–60 °C), rates the sensor IPX8 and names ice baths and cold plunges among its uses.
For a basement tub the display is the point – it can live in the kitchen or by the bed. The 500 ft (152 m) range is the maker’s figure, and a floor in between will shorten it. The display also keeps the highest and lowest reading of the last 24 hours. There is no timer.
Tip: Float the sensor away from the chiller’s return hose, so it reads the tub and not the freshly chilled stream.
07
Drive Medical Bariatric Heavy-Duty Step Stool with Handrail, Silver Vein
One rubber-topped step with a steel handrail gives wet feet and cold legs something better to rely on than the tub's rim.
The awkward part of an upright cold tub is the wall: about 30 in of soft-sided tub with nothing firm to hold. This step stool from Drive Medical, a maker of mobility aids, puts a ribbed rubber platform of about 14 × 10 in (36 × 25 cm) beside the tub and a steel handrail 34 in (86 cm) high next to it. The frame is welded steel on rubber feet, with a listed capacity of 500 lb (227 kg), and it arrives assembled.
It is one step, no more than 10 in (25 cm) high, so it shortens the climb rather than removing it, and the rail is on one side only. The listing describes a household stool, not a spa step – what recommends it here is the rail, the rubber and the footprint.
Tip: Stand it snug against the tub with all four feet flat on the floor, and check that it does not rock before you trust it with wet feet.